90 Degree Turns
There are certain circumstances in which the fence cannot be installed using regular turns and you are required to make a 90 degree turn. This usually occurs for two reasons. One reason is that the turn is to tight to make using one pole as the pivot pole, the other reason is that the customer wants it to outline their deck perfectly that contains 90 degree turns and the customer does not want a regular turn because they do not want to cut corners and lose deck space. In order to accomplish this you will be making more cuts than you would in a standard installation so it is recommended that you charge for the extra work and material that will be wasted.
Steps
- The first step to installing a 90 degree turn is the mark out of the turn. See diagram A1. The most important part of marking the 90 degree turn is making sure that you turn the template and mark the scribe line on the the turn. This will allow slack in the mesh of the fence allowing the poles to turn so that the latch can connect at the standard 2 1/2" space without being to tight. For a close-up view of the turn refer to diagram A2.


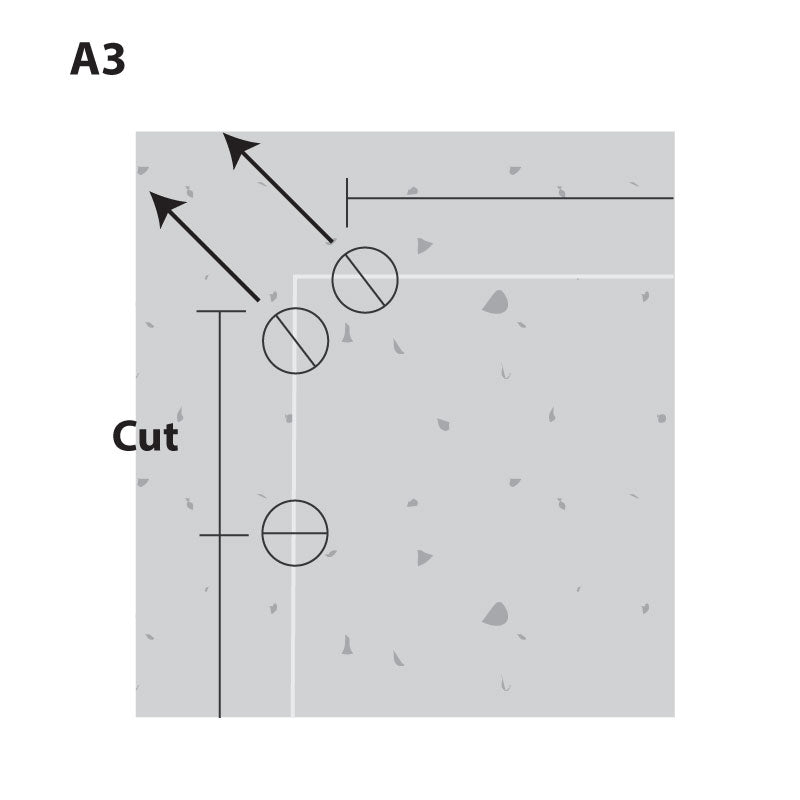
- The next step is to drill these angles properly so that the fence will have a nice 90 degree turn connection. Diagram A3 depicts how the angles should be drilled for this particular example. 90 degree turns consists of two poles connecting. This means that you are now dealing with the strength of two poles that are going to be pulled in when tension is added. Therefore you do not have to lean the drill out as much as you would if you were dealing with a single pole.
NOTE: Do not try to do a 90 degree turn with a single pole. If you try to complete a 90 degree turn with a single pole the result could be a bowing effect on the pole. Too much stress on the pole will increase the probability of the pole breaking it also looks aesthetically incorrect. Diagram A4 illustrates how the fence should look after being drilled and before you connect.